Wednesday, November 28, 2012

Apertures Explained

As I re-read my recent post about a photo I had taken, I realized that I might have left some people hanging with regard to camera apertures.  I touched on what an aperture is, but didn't really tie it back to the 50mm lens I wrote about.  Nor did I properly explain just what apertures have to do with photography other than making parts of the image blurry and others in focus.  This, then, is sort of a follow-up to my "Mockingbirds, Photoshop, and Miss Maudie" post but it's really just designed to be a tutorial on one of the basic functions of a camera. If you have not read that entry yet, I encourage you to do so as it introduces some concepts that will be covered here like depth-of-field.

Let's start at the beginning: cameras takes pictures by capturing light on an electronic sensor.  Prior to digital cameras, this sensor was a piece of film but nowadays it's a microchip that essentially performs the same function.
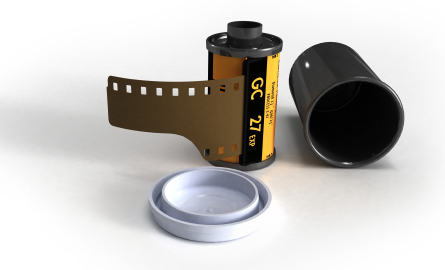
Kids today will have no idea what this stuff is.
The light that hits the sensor is controlled by the lens of the camera, which is the big cylinder-like object that sticks out from the front.  All cameras have a lens, even small ones like on an iPhone.  The lens is what lets light come in and hit the sensor which is inside the camera body.
Every camera camera lens also has a mechanism that controls how much light is allowed to enter through the front and pass to the shutter.  The size of this opening is called an aperture, and it is one of the three key pieces that, when put together, control much of how photography works (the other two being shutter speed and ISO, but we'll get to those another time).  It's a lot like how our own eyes work, actually.  Have you ever woke up in the morning, turned the lights on too soon, and had to squint or close your eyes quickly because things were so bright?  That's because when it's dark, our pupils open wide in order to let in more light.  And in bright light, our pupils shrink because there is so much light they simply don't need to be open in order to let enough in.  For example, in the image below the pupil on the left is dilated and will let in a lot of light. The pupil on the right is contracted and not much light will be let in.  At night or in dark conditions, our pupils open big to let in every bit of available light, but in the daytime our pupils contract because there is so much light around us that they don't need to let it all in for us to see properly.
Image courtesy of Aurora Health Care
Camera lenses work in the exact same way: when the aperture is wide open, a lot of light is able to enter.  And when the aperture is small, not much light will enter. But what does all this have to do with taking pictures?  Good question.  For what I hope is a decent answer, here's a video I made that addresses this:


When my wife and I were looking at DSLR cameras, I was surprised to find out that most of the standard lenses they came with could barely zoom in and out.  A common 18-55mm "kit" lens doesn't really zoom in that much, and this confused me.  Our Panasonic ZS7 had a monstrous zoom lens, so why wouldn't a fancy DSLR have the same thing?  Because even though our ZS7, and most pocket cameras nowadays, have lenses that can zoom in and out, they make a critical compromise in order to do so: they can't let in very much light.  And not only that, but the image sensor (or film) inside most pocket cameras is much, much smaller than those found in DSLR cameras.

When a lens goes from wide-angle (you can see lots of stuff) to telephoto (you zoom in), the physical elements of the lens's construction behave in such a way that the maximum aperture (or opening) of the lens almost always shrinks.  It's just not physically possible to keep a really big aperture when zoomed in, unless you spend thousands of dollars on a mega-fancy lens.  And in bright light situations, like a nature hike or backyard picnic or outdoor sporting event, this is fine because there is so much available light that the camera does not need a very big aperture in order to get enough light to take a nice photo.  You can even zoom in on things, like a woodland critter or a single athlete, and take a decent picture because the camera has so much light to work with.  But when taking pictures indoors or at night, it is simply not possible for the apertures on many small cameras to be big enough to let enough light in.  This is why most cameras have a built-in flash: they have to create their own light in order to make up for their small lenses, which are incapable of letting a large amount of light through the lens to reach the image sensor.
A 110 camera with a stack of single-use flash bulbs.
I actually had one of these when I was a kid :)
Image courtesy of Wikipedia
Another way to compensate for a small aperture is to leave the shutter open longer, which gives the image sensor a longer period of time to collect the available light coming in. This is fine if the subject of the photograph remains still, but in most situations either the subject is moving or the camera is moving. Using a tripod can eliminate the latter problem, but if you are taking pictures of, say, your daughter's evening soccer game it's somewhat impractical to ask the team to freeze motionless in the middle of a play while you snap a picture. But like I said earlier, in bright daylight this sort of thing is not a problem.  A camera with a small aperture doesn't need to have the shutter stay open very long in order to let in enough light for a picture to be captured, which is why a pocket camera with a long zoom lens is just fine in many circumstances. On the flip side, leaving the shutter open for a longer period of time can produce very pleasing photographs given the right conditions.

Ever wonder how photographers get shots like this? They shoot in low
light with a tripod and leave the shutter open for a long time :)
Image courtesy of user TuffTuffTuffTuff on Reddit
Let's back up for a minute here, and take a look at the 50mm prime lens now that we have discussed various aspects of a lens aperture.  This lens, and others like it, doesn't zoom in and out, but it does have a big maximum aperture of f/1.8 (for an explanation of how apertures are measured, check out the excellent Wikipedia entry on F-numbers or the DPReview glossary).  This means that it captures a lot of light--enough such that a flash is rarely necessary, even indoors or in lower-light conditions.  It is also capable of a very shallow depth-of-field, which I discussed in my Mockingbird entry as well.  These features make it an incredibly versatile lens, provided you are not trying to capture a wide angle of view. Let's compare this to the kit lens from earlier.  While the kit lens does zoom in and out, it has some significant drawbacks that must be considered.  When it is zoomed out all the way to 18mm, its maximum aperture is f/3.5.  When the lens is zoomed in all the way, its maximum aperture is f/5.6. (For an explanation of what it means to say 18mm, 50mm, etc., check out the excellent Wikipedia entry on focal lengths or the DPReview Glossary.)  This means a couple of things:

• In order to make the lens let in as much light as possible (f/3.5), the lens has to be at its widest-angle setting of 18mm.  Indoors or in low-light settings, a flash might not be necessary.
• When zoomed in all the way to 55mm, the lens is not capable of letting in much light (f/5.6). Indoors or in low-light settings, a flash is almost always necessary.

These limitations are not necessarily a bad thing, but they are important to know when shooting.  Also, a kit lens is relatively cheap, which makes it a good choice for photographers who want a lens that, while not perfect, is decently suited for a variety of settings.  For the sake of comparison, let's look at the Nikon 27-70mm f/2.8 lens.
*drool*
Image courtesy of Nikon USA
This lens, while heavier and significantly more expensive than a kit lens, has the significant advantage of maintaining a maximum aperture of f/2.8 across its entire zoom range of 24-70mm.  This means that indoors or in a low-light setting, a flash is probably not necessary and the lens is capable of a very shallow depth-of-field.  These properties make this a far more versatile lens, and ideal for an incredible variety of settings...provided you are willing to fork over almost $2000 for it.

Let's bring this back to the realm of pocket cameras, like my Panasonic ZS7, which I said had a "monstrous zoom lens."  Keep in mind that in order to get a telephoto zoom lens on a little camera with a little image sensor, the lens aperture has to be (thanks to the laws of physics) super duper tiny.  Compare that to the Sigma 200-500mm lens which really is a monster, and has an incredible zoom while maintaining a freakishly large aperture of f/2.8 for the entire range:
Kind of impractical to carry around to your daughter's soccer game, eh?

Before I wrap this up, I want to touch on one critical question that many people still have: how do you set the aperture on your lens?  On many pocket cameras, you can't.  Most of the time this is controlled by the camera's internal software, though many cameras have scene-specific modes such as "Sports," "Fireworks," "Beach," etc. that contain aperture-and-shutter-specific presets for a few given scenarios.  Some pocket cameras do have manual control options that allow you to set the aperture, shutter, and ISO, but they are often hidden in various menus or control dials.  If you have a pocket camera it's worth checking out, though, and some even have dials that say something like "M A S P" or "M Av Tv P"

M = Manual. You have full control over the aperture and shutter values.
A/Av = Aperture mode.  You control the aperture of your lens, and the camera determines the appropriate shutter speed.
S/Tv = Shutter mode. You control the shutter speed, and the camera determines the appropriate aperture setting.
P = Program auto. The camera determines what it thinks are the best aperture and shutter values.

To adjust the aperture, switch to A or Av mode (you can also use the M mode, but that's a tad more complicated) and you will then be able to set the aperture of your lens using a dial or series of buttons on your camera.  Keep in mind that a smaller number means a bigger aperture, or more light coming in to the lens.  A bigger number means a smaller aperture, or less light coming in to the lens.

So that's the basics, folks! There's a lot I didn't cover here, and a lot that I didn't really explore in depth, so if you have questions just leave me a comment below and I will be happy to help as best as I can :)

Wednesday, November 14, 2012

Mockingbirds, Photoshop, and Miss Maudie

One issue that I was wondering about when we bought our Nikon D200 camera a few months ago was the lens. Like most people, I wanted to be able to zoom in and zoom out because, well, why not? Our little pocket camera has a monster zoom, and I didn't see why a big ol' DSLR would be any different.  But you probably know by now, if you have been reading this blog with any regularity, that we chose against a zooming lens and instead opted for a 50mm Prime f/1.8 lens.  It didn't take me long to realize that this was an outstanding choice, and after taking more than 6,000 photos with this lens and body since May I have come to realize why it really is such a fantastic lens.  This morning, then, was sort of a case study illustrating exactly why.

I work on a college campus and we often have birds, squirrels, and other animals running around and staking their claims on various flora outside the buildings.  Yesterday I noticed a pair of mockingbirds hanging out on top of a shrubbery across the street, and thought they were rather photogenic. So today I hauled my camera to work and managed to snap a picture of one of them. Fortunately, this little guy must have read my mind because he happily complied with my wishes and sat still long enough for me to snap his photo:
"Mockingbirds don't do one thing but make music for us to enjoy." -Miss Maudie, To Kill a Mockingbird
To take this picture I first had to figure out what angle at which to shoot.  Too high and it would seem like he was buried in the bush. Too low and he would be obscured by the shrubbery. This is when the "sneaker zoom" feature of a 50mm lens comes in handy: it forces you to move around and seek out the best angle for a given shot.  Not being able to rely on a mechanism to zoom in and out forces you to take in the surroundings and actively seek out the best angle and location from which to shoot.  I spent a few minutes walking around the bushes until I found a good spot, and thankfully he waited patiently for me while I was doing it.

Another issue to consider when planning a photo is the aperture you want to use on your lens.  The bigger the aperture, the faster the shot and the shallower the depth-of-field.  Basically, this means two things: the lens lets in more light and the shutter doesn't have to be open very long, and the area that is in focus is very small.  This made it possible to get only the bird in focus, and not the rest of the bush or the background (the blurry background is also called bokeh).  Here's an illustration of how this worked as I was taking the shot:

For this shot I used an aperture of f/2.4, which meant that given the available light the shutter was open for 1/350th of a second and the depth of field was very shallow. This helps draw the viewer's eye to the bird and not the surrounding area, which generally makes for a more visually pleasing photo.  A smaller aperture would have meant that the bushes, and possibly even the building in the background, would have been in focus too. This isn't necessarily a bad thing depending on the type of photo you want to take, but for this particular shot I thought a shallower depth of field would be more appropriate.  And that's the thing about photography: there's never one correct way to do it. As long as you find something that works for you and you're happy with it, you're all good.  Most pocket camera lenses have smaller apertures, and kit lenses (i.e. the lens that comes with the camera) on DSLR models aren't a whole lot bigger.  But again, it's all about what works for you and knowing how to use what you have.

Anyway, back to this shot for a bit.  Since a 50mm Prime lens cannot zoom in and out, and getting too close would have probably disturbed my new bird friend, the original shot is actually quite a bit larger:
I thought the surroundings were a tad distracting, so I cropped the photo to be tighter and bring the subject (the bird) in closer.  You might also notice that the colors of the original photo are not as vibrant as the one I posted at the top.  This is due to some post-processing I did in Photoshop but the same thing could be done in just about any image editing program, even basic ones like iPhoto.  I'm generally not a big fan of over-editing images, but I do think some degree of alteration is just fine.  And like I said earlier, it's all up to you.  Some people like to adjust everything in Photoshop, and some like to leave the photograph as-is.  Other times it's about the purpose of the photograph: are you trying to capture a scene, present an emotion, manipulate the viewer, tell a story, or ask a question?  Photoshop, as I see it, is just another arrow in a photographer's quiver to allow him to hit the target for which he is aiming.  Anyway, for this picture I used Adobe Camera RAW to adjust the contrast and saturation of the original, and then Photoshop to crop it down and add a bit of vignette.  I am pleased with the final result, and I hope you are too :)

Finally, I thought I would mention one other thing: megapixels.  For years I was under the impression that more megapixels equaled better pictures, but in truth this metric has almost nothing to do with the quality of the photos taken by a camera.  Don't take my word for it, though--just do a quick search on "megapixel myth" and you'll see what I mean.  But permit me, if you will, to use this mockingbird photo as a case study.  Our camera has a maximum resolution of 3872x2592, which means it's just a tad over 10 megapixels.  This is pretty low for cameras today, and even most pocket cameras have at least 14 or 16 megapixels. It works fine, though, and if you download the full-size photo at the top of this post you might notice that it clocks in at just a hair over 3 megapixels at 2638x1536.  Would a 15- or 20-megapixel camera have made the photo any better?  Probably not, though having that extra real estate would have allowed even tighter cropping for the final image.  Is a higher mexapixel number a bad thing? No, generally not. But I say all this to illustrate that lower megapixels on a camera doesn't mean it's a bad camera either.  So if you have an old model that you think isn't worth using anymore just because it has fewer pixels, I would say don't worry about it. Instead, go grab that sucker and get out and take some photos!

Monday, November 05, 2012

Moving on up

Two weeks ago Apple held one of their famous big ol' press events, at which they announced several new products including an iPad mini and updates to their current computers like the iMac, Mac mini, and Macbook.  They also updated their flagship iPad to its fourth generation which meant a faster processor, better screen, and better wireless connectivity.  This flurry of new products also meant that some of their former devices were bound for the bargain bin, such as the third generation iPad which was released to an eager tech-hungry public only a scant seven months ago in March.  That's not to say that the third generation iPad is somehow an unworthy technical device--far from it, in fact, with its zippy A5X chip and retina display which, when it launched, was a revolution in the tablet industry.
Almost immediately after the fourth generation iPad was announced, Apple started selling the former king of the tablet hill for the super-bargain price (as far as these things go, anyway) of $379. I already have an iPad, but saw this as a good opportunity for some people I know whom I thought would be able to make use of such a device.  One of these individuals is my mom, who has been doing mobile computing on an aging Windows Vista laptop for the past few years.  It works, but it's somewhat unwieldy and the battery life...well, let's just say my mom keeps her power cord close at hand at all times.  So I emailed my mom to let her know about the iPad 3, thinking she might be interested in possibly upgrading.  Much to my pleasant surprise, she was all in and ordered one that very same day.
One is an iPad 3. One is an iPad 4. Can you spot the difference?
It arrived a few days later, and as luck would have it the delivery man was a former neighbor who works for FedEx. Small world, eh? Soon my mom was busying herself with realtime video chatting, messaging, email, and internet surfing from a device about 20% the size of her laptop without worrying about battery power.  She seemed to be thoroughly enjoying her iPad, so much so that we offered the same information to my wife's mother who followed suit and bought one too.  In the space of a week both our mothers upgraded their technology by leaps and bounds, and we were thrilled to be along for the ride!

It has been about a week since they got their iPads, and in that time it has been so much fun helping them get acclimated to the various features and nuances of their new tablets.  We are making liberal use of Apple's Messages app, which allows us to send videos of our son to grandma and grandpa free of charge--and they are in turn sending videos right back to us.  My wife's mother was so enamored of her iPad she gave it a name, Padi, and was thoroughly delighted to discover things like the Siri search feature and the built-in dictation too.

There have been a few hiccups along the way, but we are thrilled with how this transition has gone and looking forward to helping our parents become certified techno-geeks :)

Friday, October 19, 2012

Photographically speaking

One thing I like to do, especially this time of year, is take our camera with me whenever I happen to be walking around somewhere.  It's sometimes a bit of a hassle, given that the body is rather large and conspicuous, but having a camera makes me look at things a little differently.  Carrying a clunky DSLR often causes me to think consciously of different ways to look at the world around me, and think about what objects and designs would make good photographs.  Not that I am a good photographer by any means, and certainly far from it by any objective measurement.  But the secret to becoming a good photographer, like any skill or trade, is simply doing it repeatedly and refining your technique over time.  One thing I am not very good at is finding things that would make for interesting pictures, though, which brings me back to the original point of this post: forcing myself to look for these opportunities.  Rarely will a good scene just appear before my eyes, gift-wrapped and labeled as a Good Picture Opportunity.  Instead, I have found that these times must be sought out and pursued, and even then the picture itself must be evaluated, planned, and composed. Of course there are exceptions to this, and many great photographers have taken many great photographs simply by being in the right place at the right time, but for me this is something that I have to continue to learn and refine by repeated practicing.  Take this photo, for instance:

(click to view full-size)
I was pushing my son in his stroller a week ago, and we were just walking through the neighborhood when I spotted this patch of flower buds next to a mailbox.  It's the kind of thing that, normally, I would have not even noticed and simply passed by.  But because I had my camera with me and was actively seeking photograph opportunities, I decided to park the stroller, sit down on the street, and snap a couple pictures.  I didn't adjust anything in Photoshop, though perhaps I could have cropped it a little, but overall I am pleased with this picture.  I like the shallow depth of field (I think it was taken at f/2.8) and the bits of purple that contrast nicely with the overall green and brown tones.  I also like that the setting discernible but not distracting.  There's a bunch of things wrong with the picture too, and I think I could have found a more interesting angle from which to photograph it, but these are the kinds of things that, hopefully, will continue to improve over time.

A few days later I happened to have my camera on campus with me during a bit of a rain shower.  It wasn't a downpour, but there was enough water to make things interesting and the clouds were creating just enough of an overcast sky to allow for decent picture-taking.  My boss and I were coming in to the building and she casually said "Hey, you should get a picture of the dogwood tree."  She meant the whole tree, but with my 50mm lens there was no way I could have fit the entire thing in frame.  So I went for the opposite approach and decided to try getting just a part of the tree instead:
(click to view full-size)
I have taken other pictures of tree leaves and things like this, but I think the overcast sky and the wet leaves made for a slightly more interesting photo opportunity than what otherwise might have been.  The drips on the leaf bring out the colors, and I like the way the tip is turning brown too.  It's kind of a reminder that time is passing, and even beautiful things like this tree will fade over time.  The curly leaf on the left side of the photo is kind of cool too, and like the previous picture I did not adjust anything in Photoshop though I did crop it just a bit. Originally there was part of a leaf on the right side, which kind of ruined the composition, so I just cropped the picture until it was gone.  This photo could be improved in many ways too, and I'm not throwing it up here to showcase any type of photographic talent or skill.  I just think it's fun to share pictures like this, and I also see myself getting better at this kind of thing over time.

I also enjoy learning more about my camera and lens through photography also, and finding ways to tame the awesome powers of the 50mm lens.  But I also like hearing from other photographers too.  It's my favorite way of learning more about photography and picture-taking...so do any of you have tips or tricks to recommend?  Or how about photos to share?  Let me know in the comments!

Thursday, October 11, 2012

Gems in the rough

Last Friday I came home from like usual, to my wife and son were playing in the yard while waiting for me to pull up on my bike.  We continued to let our boy explore nature for a few minutes, and as he played in the grass my wife told me about an estate sale she had seen that afternoon while pushing the stroller around the neighborhood.  We have always been fond of garage/lawn/yard/estate sales, but the latter generally have the highest potential for finding some sweet deals (case in point: the mint-condition shop vac I snagged three years ago at an estate sale for $15).  We decided to hold off on dinner for a little while and take a stroll to the neighbor's house a few blocks down to see if we might strike it lucky at this sale.

Once we got to the sale we found all the usual trappings and flotsam that such things usually entail: clothes, kitchenware, tools, old electronics, and of course a room full of knicknacks.  It was fun to browse around and talk to the son of the owner about the house, which is slated to go up for sale in a few weeks.  Clearly he was fond of the place, but also seemed like they were glad to be selling it and moving into a retirement home.  While browsing through a collection of odds and ends in one of the back rooms, my wife stumbled across a few paintings she really liked, such as this one:


(blurry picture taken on my old cell fone)
She's a big fan of wall art, specifically nature scenes like this, and was delighted to find some paintings in really good shape that we could take home and hang up.  There were a couple dozen paintings like this around the house, all for sale, and while they might not have been Rembrandts they were certainly worth buying for about $20 each.

The second painting we found.

The really cool part, though, was when we got to talking with the mother of the guy from earlier.  Turns out she and her husband were selling the place and decades of their own personal possessions in order to move to an assisted living facility nearby.  The woman, named Virginia, took up painting at a hobby several years ago and created all the works we were seeing throughout the house.  It was an impressive display of artistic talent, and we were thrilled to get to meet the lady who had painted these works of art.  She humbly dismissed virtually all our praise, even suggesting at one point that we might want to whitewash one of the paintings because it wasn't very good, but at least we would get a decent frame out of the purchase.  We told her that such a concept was rubbish, and we were pleased as punch to be able to buy these paintings and put them on our walls at home.  She smiled kindly, and we walked home with two paintings along with a stud finder, a fertilizer spreader, and some fabric.  Yay for estate sales!
Another day, another painting
The next day we went back to see if any of the paintings were still available, and sure enough there was a handful left.  We picked up this winter cabin scene and again passed some time just visiting with Virginia and her other family members who were there to help out with the sale.  Soon we went home with a third painting, thinking about where we might want to put it.  But that's not where things stopped.  On Sunday we went back one last time, and picked up this gem:


Through all this, Virginia was just pleased that people were buying her paintings and happy that we came by with our 15-month-old son to see their sale and visit with her and her family.  Through it all I got the distinct impression that this couple had lived life on their own terms, doing what they wanted and finding ways to be happy despite what circumstances befell them.  Even as they watched their history get tagged and sold and carted out the door, they were happy.  Through our talks we discovered that they were moving to an assisted living facility not out of resignation or poor health, but simply because they wanted to live life on their own terms.  They did not need trinkets or tools or couches or fancy decorations to give their lives purpose and meaning.  Just each other.  I hope when these paintings adorn our walls we will appreciate them, but remember that in the end they too will pass away.  And after all is gone it is the relationships that matter, and not the memories but the people with whom they were created.

Wednesday, October 03, 2012

10-Minute Restoration

Even though I'm 32 years old, I'm a big fan of some tried-and-true basics when I need a quick lunch fix. Macaroni and Cheese (Kraft, mind you. Never the off-brand), Spaghetti O's with meatballs (ditto on the name brand), and Campbell's Chunky Soup often find themselves in front of me on my lunch break, often augmented with a pickle, some fruit, or a handful of Tapatio Doritos.  That's good stuff, man, and fifty years from now I'll probably be requesting Spaghetti O's with meatballs when I've got a couple of marbles rolling around upstairs and the nursing home staff has long since given up on trying to get me to eat healthy.  I always make my Macaroni and Cheese in the same pot, too, but last week my wife discovered a bit of a problem when she went to get something in the kitchen:
The horror!  I left the stove on, and all the extra milk and cheesey goodness had been burnt and, I thought, permanently bonded to the pot.  Say it ain't so!  But for a while, it was.  I tried scraping it, washing it, and boiling it while hoping in vain that something would work.  Try as I might, victory escaped my grasp and taunted me each time...until this morning.  As I was staring at the pot wondering how I could resurrect it to its once-storied status I remembered the little bottle of Brasso we had in the cupboard.
For those of you who have never heard of Brasso, it's basically magic in squeezable form. It can clean almost anything, and I can't believe it took me a whole week to think about using it on the pan.  It's kind of like industrial-strength Soft Scrub in that it uses a slurry of microscopic particles and cleaning solvent to remove the dirt from a given surface.  A few minutes into the cleaning process my hands were getting tired but I was seeing some promising results:
3 minutes of scrubbing and all's well thus far.
Lookin' good so far!
I used an old T-shirt that I had in my rag pile out in the garage to do the actual scrubbing, and things went a little smoother when I started going in a circular motion instead of back and forth.  All in all the process took about 10 minutes, and I was left with a pot in mint condition:
Now time to go grab some Spaghetti O's and get my lunch on...

Monday, September 24, 2012

Goats At Work

I didn't grow up in a big city, but I didn't exactly grow up in a small town either. For much of my life I lived in an average-sized city of about 200K residents, but we were close enough to the edge that a 10-minute bike ride from home would put us on a dirt trail in the middle of cornfields.  It was a great place to be, and even now when I go back for a visit it still feels just as much like home as it always did.  After college I lived in the Minneapolis/Saint Paul area for five years, and while the conveniences of a big metropolis were nice, I did miss the simplicity and uncomplicated living of my former residence.  Not that it was bad, just different.  Those five years were an incredibly valuable time in my life, and though I didn't always see it at the time, there was a reason the Lord brought us to that part of the country.  Many reasons, in fact.  But now that we live in what would be considered by most definitions a small town, I often have moments when I really appreciate this place.  Moments like this:
I don't know what these goats are doing or why they are here, but as I biked to work this morning and saw them munching on vegetation behind the Hobby Lobby, I thought of how this scene would never take place back in the Twin Cities.  It's things that this that I really like about living here, and even though we have yet to get a Target store it's still a fantastic place to live.

Tuesday, September 11, 2012

Saving My Wrists (Part 2)

For the past seven weeks I have been using a RollerMouse Pro2 at work, and while I am not convinced that such a device is good for everybody I can say that it has been a nice benefit for me--particularly with respect to my wrists.  If you haven't read my initial impressions, you might want to go ahead and do that as that blog post also contains some information as to why I wanted this pointing device in the first place.

• I mentioned in my original impressions that it did not take long for me to get used to the device, and after using it for six weeks I don't even think about how different it is anymore. Using the bar to move the pointer around onscreen is second nature, and I really like that I don't have to move my right hand over to the side of my desk and grab the mouse like I used to. However, when other people are at my computer to view demonstrations or look up information, they often get confused and I have to do the navigation for them.  This could be a good thing or a bad thing, depending on your point of view, but it's not really an issue for me.  I thought I would mention it anyway though.

• It is comfortable...for the most part.  I am still using my old wrist rest (basically a super oblong bean bag) because the wrist rests on the RollseMouse Pro2 don't extend very far down.  I think the manufacturer knows about this too, because they sell an extended wrist rest for about $40. That's a tad expensive if you ask me, and I think the device itself should probably just come with more padding for people's wrists.  Don't get me wrong, though--it is not an uncomfortable setup at all, but when paying $200 for what is basically a glorified mouse, I would have hoped it would come with the extended wrist rest too.  At the end of the day my hands feel much better than they used to, and I guess that's what really matters.

I'm still not sure why this thing extends so far to the right, but maybe it's to accommodate gigantic keyboards.


• It works great for 95% of the tasks I do on a daily basis.  Navigating the internet, answering email, working in Excel, even simple video editing tasks are just fine on this device.  In some ways it is a marked improvement over a regular mouse, since the copy/paste functions are mapped to specific buttons and the double-click button really comes in handy far more than I would have initially thought.  What it does not work well for is anything involving photo editing, which admittedly is not a large portion of my day, but any time I fire up Photoshop or Fireworks I start to long for my trusty ol' Logitech mouse.  I would, however, venture to say that for most people it would be a great addition to their workspace.

• The seven buttons work just fine, but I think there is a bit of form-over-function going on.  The concave layout of the right/double/left click buttons, with the scroll wheel in the middle, looks great on paper and in a catalog but in practice the buttons are a bit awkward and my hands even start to cramp a little.  I'm not sure what would mitigate this, and most of the time it's not really an issue but I thought it would be prudent to mention this here anyway.

So was it worth $200? I dunno.  My first instinct is to say "Probably," but it depends on your situation. I would recommend getting their 30-day trial to judge for yourself, but I suppose only several years of using this kind of device would be the only way to really judge its effectiveness.  If you are a graphic designer or video editor, this is almost certainly not the right pointing device for you.  But if your job involves pretty much anything else, it's worth a shot.

Wednesday, September 05, 2012

Ignorance, Bliss, and Electrical Tape

I recently went back home for my friend's wedding, and since my wife and son couldn't come with I had to make the trip with only my trusty iPod and Garmin GPS as travel companions. I have made this drive before, and while it's not nearly as enjoyable without the human company, it's not really that bad as long as I can keep my mind occupied. And the best way to do that, in my experience, is to fill my iPod not with music but with podcasts. Specifically This Week in Tech, Mac Break Weekly, Radiolab, Left Right and Center, the Game Informer Podcast, and Focus on the Family's PluggedIn Podcast.  Listening to music, especially songs with which I am already familiar, causes my brain to go numb after a few hours in the car. But listening to people talking, particularly if they are discussing ideas and news, keeps me interested and engaged.  And so I set out on Interstate 35 with enough talking heads (not to mention a bag of salt and vinegar chips, and another bag of Jelly Bellys) to keep me awake for days. But I also had an ace up my sleeve: a modification I made to my car before leaving that, more than anything else I did to prepare for the trip, made all the difference between enjoying the drive and haggardly wondering how much longer until I get there...

It's kind of hard to see in this picture...

Ok, let's try this one instead. (click to view full-size.)
In case the pictures don't make it clear, I took a piece of electrical tape and covered up the clock in my car.

What this did was remove any possibility of me being able to check what time it was.  I knew that I left town around 5pm, but after that everything melded into one continuous journey with no timestamps by which I could gauge my progress.  Normally on a drive like this one the clock is constantly visible right there on the dashboard of my car, telling me what time it is and providing a continual stream of information to my brain about how much longer it is going to be until I reach my destination. Any feelings of ambiguity are tossed aside so that I might be constantly made aware of how long I have been on the road and how much is left to go.  If I cross a state border or go through a town, a quick glance at the clock tells me whether I am making good time or falling behind.

But the thing I realized is that it doesn't matter if I'm making good time or falling behind. As Vash the Stampede would say, "Whatever happens, happens." I'll get to my destination when I get there, and in the meantime covering up the clock in my car helped me sit back and enjoy the ride.

So how did it go?

Fantastic.

I took the same route back home as always, but had no idea if I was arriving at the usual landmarks when I normally would. I pulled up to the same Conoco gas station as always, but had no idea what time it was so I didn't worry about whether or not I could take my time.  So instead I just sort of took it easy, and when I was ready to go I hopped back in the car and continued on.  Later I had to use the bathroom, and normally I would question whether a stop would be worth it, given the precious minutes it would add to the drive. But since I had no concept of how long I had been driving, or how long I had left, it didn't really matter.  Twice I pulled over just to take some photos, and once I stopped just to get out, walk around, and stretch for a while.  Not having a sense of time made it impossible for me to gauge my progress, and instead I just got to enjoy the ride. Basically, it allows me to drive with the Spike Spiegel philosophy of "Whatever happens, happens."


I have since left the tape over the clock on my car, and though driving to work isn't the same as driving across three states, it has made a measurable impact on my state of mind while I make the 2.5-mile commute in the afternoon.  I leave when I leave, and arrive when I arrive. And in the meantime there is no clock to tell me if I'm going to be late or not.  In essence, that decision has already been made the instant I set foot into the garage, and by then it's too late to change anything. And if I do happen to be running late, the clock is not taunting me or daring me to run red lights and blow through stop signs.  Thomas Gray proposed the idea that ignorance is bliss, and while I can't say I entirely agree with him, I do know that getting rid of the clock in my has entirely removed one source of potential worry and stress in my life. And it sure is nice.

Wednesday, August 29, 2012

Adding a little spark

We have two cars: a 2007 Toyota Matrix with about 80,000 miles, and a 1998 Toyota Corolla with about 140,000 miles. In some ways, the latter reminds me of Charlie Brown's Christmas tree.  It had a salvage title when we bought it in the late autumn of 2005, which meant that it was in a wreck but had been fixed up before being sold again. It was a big mistake though, because in the next few years we had more than our fair share of headaches due to a very poor reconstruction job. Thanks to a great deal of help from my dad, though, we have been driving it ever since and hope to keep it until something really bad finally goes wrong and it's just not cost-effective to keep it around.  I change the oil myself ever three-to-five thousand miles, and we don't really abuse our cars with any crazy driving habits either, so it's not out of the realm of possibility that the Little Corolla That Could will go to 200,000 miles or even beyond.  Last night, though, I finally checked something on the car that probably should have been looked at sooner: the spark plugs.

These suckers should have been changed about 20,000 miles ago
These little thingeys are responsible for igniting the gasoline during after the compression phase of a four-stroke engine, and if they are worn out they can cause a misfire or make it harder for an engine to start.  Ideally the gap between the electrode and the contact on these spark plugs should be about 0.04 inches, which you can test using a gap tester (the millenium falcon-like disc in the above photo) like so:
Most spark plugs have one elctrode. These have two...for twice the craziness!

On these worn-out spark plugs, the gap ranged from 0.05 to 0.06 inches, which might not sound like a whole lot but over time it can result in poorer engine performance, lower mileage, and increased emissions.
Gap tester or movie prop? You decide!
Testing these things is pretty simple: just stick the gap tester between the elctrode and the contact, and turn until it won't move anymore.  I should also note that getting the spark plugs out of the engine is super easy, provided you have a spark plug socket.  I have a Craftsman tool kit that includes such a socket, but I don't know if this is standard for these tool kits anymore. If not, you'll have to buy one separately :( Basically it's just a longer 5/8" socket with a rubber insert to help pull the spark plug out of the engine once it's loosened.

Anyway, once the spark plugs were all out I popped in my new set of  NGK's I bought for about $30, or around $7.50 each. There are less expensive options, but in the dead of winter when I'm trying to get my engine to turn over I'd rather have the peace of mind that comes from knowing I didn't cheap out on spark plugs.

Just to clarify: this is the box the spark plugs came in. Not the actual spark plug.

All in all the operation took less than 20 minutes, which isn't too bad considering it saved a lot of future headaches down the road. Get it...down the road? Bwa ha ha!

Thursday, August 23, 2012

Cleaning it out

Note: Sorry for the lack of updates recently. I could give excuses about how I was out of town for 10 days, and then out of town for a weekend, and how the semester has been busy, and stuff like that. But instead I'll just blame my lack of updates on my continuing quest to beat Super Metroid.

It hasn't rained a lot in our state recently, and by that I mean that the half-inch of precipitation we got on two separate days last week was the first time it has rained in months.  But when the clouds gathered and the showers came, it was almost like Christmas morning. I stood in the living room and just watched the brown grass in our back yard soak up the water, and could almost feel our big ol' Chinese Pistache tree drinking it all in.  Then I noticed that on one side of the window a small waterfall had formed, and realized it had been entirely too long since I had cleaned the gutters.  So last night I busted out a couple of my trusty tools in the garage and set about making things right, so the impending precipation that is forecast for the weekend might drain properly and away from the house foundation.

When we first moved in I must admit I had no idea how to clean the gutters. This sounds kind of dumb, but it's one of those homeowner things I never really thought about because it just didn't affect me.  I guess when I was a kid my dad must have cleaned the gutters from time to time, but I can't remember helping him.  And when we lived in an apartment up in Minnesota I didn't really have a reason to clean the gutters because the maintenance dudes took care of that sort of thing. So three years ago when faced with this situation I grabbed a ladder, some gloves, and spent an hour crawling around the roof just scooping dead leaves and muck out with my hands. It was crude, but it worked.

Then I found this thing while browsing at Sears:

The Shop-Vac gutter cleaner!
I don't know if I have mentioned it on this blog before, but a shop-vac is one of the most useful objects a person can have in his or her garage.  It's hard to explain exactly why, but there are all kinds of situations in which the best solution is "just get out the shop vac." I once used mine to find a screw that fell out when I was replacing a part on my barbecue grill--by vacuuming about a square yard of the lawn and sifting through the debris on the driveway.  And it turns out shop vacs are ideal for cleaning gutters, provided you have an attachment like the one above.  But if you do, don't use it like the guy in the picture, who is using it with his shop vac on reverse to blow flotsam and jetsam out of his gutters.  I like to use mine to actually suck up all the muck and gunk, because blowing it out means a good portion will end up on the roof and then right back into the gutters during the next rain.

"But wait a sec," you might be saying. "Won't this ruin the filter of my shop vac?"  No, not really.  Not if you have a handy-dandy air compressor! Just take off the filter and blow it out real nice and good for a minute or two. It won't be as good as new, but it will get rid of much of the dust, grit, and particulate matter that accumulates after heavy use.

This gutter cleaning method isn't as fast as hopping up on the roof and scooping everything out manually, but when paired with an iPod and a fresh supply of TWiT podcasts, the chore can be done in an hour or so, and you might learn a few things along the way :)

Wednesday, August 01, 2012

Saving my Wrists

Since I work in an office at a computer, my hands are constantly making small movements for typing and using the mouse. From what I understand, this type of repetitive motion over time can cause Repetitive Stress Injury, increase the likelihood of developing Carpal Tunnel Syndrome, make your fingers fall off, exacerbate global warming, and all manner of mass hysteria.  So in an effort to make sure I don't kick the bucket in five years because of workplace hazards, I have tried to engage in some habits at work to keep the ol' ticker going a little longer:

• I ride my bike to work.  It's only 2.5 miles, but it's better than nothing.  Usually I bike in the morning, then bike home for lunch, and drive back in the afternoon.  With a summer of temps above 100 degrees, things get a little too warm to be biking to and from an office in the afternoon.

• I drink lots of water. For years now, I have made a conscious effort to consume one 32-ounce bottle of water before lunch and another one after.  I still drink a can of pop each day though :)

• I use a GeekDesk that allows me to stand all day.  Sitting, as it turns out, is way bad for people so for the past year and a half I have basically stood up at work. Sometimes I lower my desk if I'm having one of those days were standing is just a little too tiresome, but that's generally about a half hour or less.  I could write a whole post on how great it is to stand up in the office all day, but I don't want to get too sidetracked here.  Suffice it to say, it's pretty kewl.

• About a week and a half ago I started using a RollerMouse Pro2, which brings me to the subject of this blog post.
The RollerMouse Pro2. Like I told the guy in their service department, "it looks kind of weird."


Here it is with a keyboard attached.  Whee!
For a while now I've had some minor aches and whatnot while at work, presumably from all the typing and moving the mouse. Back in spring we had an afternoon seminar on workplace health and how to improve our daily habits to stave off atrophy, and one of the things that was mentioned by the facilitator was to get a mouse like this one to reduce the stress of constantly reaching back and forth for the mouse.  She could have been speaking directly to me, because this is exactly what has been hurting my hand for some time now.  I talked things over with my supervisors and they agreed to get me this pointing device on a trial basis to see how it works out.  So here's my thoughts so far...

• It didn't take nearly as long to get used to as I thought it would. Instead of a trackpad, you roll a little bar up and down and back and forth, which seems kind of goofy until you try it. Then something in your brain clicks and it just kind of makes sense.

• It is very comfortable.  Much moreso than moving my hand over to the mouse and back all day long.

• There are seven buttons, which makes it super easy to do just about anything. I'm not kidding either, and they aren't paying me to say this.  There is even a dedicated "Copy" button and "Paste" button. Why don't normal mice have this feature? (On my Logitech Laser Mouse I had to manually map "ctrl-c" and ctrl-v" to two separate buttons)

• I was a little concerned that the bar would not be able to accommodate a dual-screen setup like I have at my work, but it actually does quite nicely.  Let's say your pointer is on the right side of the right screen and you move the bar to bring the pointer over to the Start menu on the left side of the left monitor.  Pretty soon the bar hits the physical edge of its enclosure, and the pointer hasn't made it across the entire screen area yet.  Not cool!  Thankfully, the makers of this little device thought of a solution. Just keep forcing the bar to the left, and it will "click."  Voilà! The pointer instantly snaps to the left side of the screen.  It took me a day to figure this out, and it's a really nice feature that has already saved me many headaches.

• My hands don't hurt as much. In fact, my right hand is just fine and since migrating to this new mouse it has had none of the usual aches that it used to.  Granted, it's only been a week or so but it's an improvement.

So there you have it.  So far so good, but we'll see how this thing holds up in the long run.  Right now I am optimistic though, and my hands and wrists are already thanking me :)

Saturday, July 28, 2012

Stepping back in time

Maybe it's fatherhood. Maybe it's nostalgia. Maybe it's some sort of innate desire to recapture the glory days of my youth.  I dunno. But whatever it is, something deep down inside has been inspiring me to get my collection of video games back.

We didn't have much in the way of video or computer games when I was a kid, partly because we were too busy playing outside but partly because my parents (wisely) did not allow us to partake in those kinds of electronic distractions.  They encouraged us to build things with Legos, play with rubber band guns in the basement, dig holes in the yard, ride our bikes down to the park, go to the local pool to swim...as long as we were home by bedtime the neighborhood was pretty much fair game. It was a great way to grow up, and I hope I can give my son a similar type of childhood too.  As my siblings and I got older, and had something resembling disposable income thanks to paper routes and after-school grocery store jobs, we started to indulge in the electronic entertainment arts a little more.  Over the years we had various incarnations of Nintendo consoles like the Game Boy, Game Boy Color, Super Nintendo (we missed out on the original NES), Nintendo 64, Game Boy Pocket Color, Game Boy Advance, Game Boy Advance SP, and on down the line.  Put together a list of classic games from the early- to mid-90's era, and chances are we owned 'em: Super Mario World, Metroid II, Super Metroid (very close to the top of my list of All Time Favorite Games), Chrono Trigger, Final Fantasy III, Super Mario 64, Pilotwings 64, Zelda: Link's Awakening, Zelda: Ocarina of Time, Super Return of the Jedi, F-Zero, and the list goes on.
My first Game Boy was black, and I spent many nights poring over Zelda puzzles on it.
I'm now in my early 30's and still enjoy playing video games when time allows. I've got an Xbox 360 and enjoy games like Gears of War (own and have beaten all 3), SSX, Fallout 3, and recently, Oblivion (I know I'm way behind the times with this, but I missed it years ago and want to play through before I tackle Skyrim).  But still, there's nothing like sitting down at night with a Mountain Dew and some classic SNES games, which brings me clear back to my original point here: lately I have been attempting to rebuild my collection because, over the years, a good deal of my video games have been lost, traded, or (*snif*) sold on eBay.  Thanks to the Virtual Console, this is is much simpler than actually owning a cabinet full of physical video game systems and tracking down all their respective classic games (some of which can be quite expensive nowadays).  We've got a couple thus far, like Super Mario Bros. 3, Ocarina of Time, Sonic the Hedgehog, and most recently, Super Metroid, but one problem with the Virtual Console is the controller.  The standard Wii controller works, but not very well, which makes some of the games like Super Metroid very tricky.  I have an old Gamecube Wavebird controller, but the oddly-shaped buttons make precision maneuvers very tricky to pull off in some of the classic games of yesteryear. The solution? A Classic Controller Pro, which I finally picked up last weekend.
Playing through some of the trickier stages in Super Metroid (can you tell I like this game?) was a breeze with the new controller, though it was a little tricky to get some of the jumps in Super Mario Bros. 3 just right. For some reason, Nintendo configured the Classic Controller Pro such that when playing original NES games, the a/b buttons are actually more difficult to press than on the standard Wii controller.  On the Wii controller, as well as the original NES controller, the a/b buttons are situated right next to each other. But on the Classic Controller Pro they are angled upward, which makes it difficult to pull off maneuvers in which both buttons need to be pressed simultaneously.
On the NES and Wii controllers, it is possible to press the left button (a or 1) with the top of your thumb, and while holding it down rock the joint of your thumb to press down on the right button (b or 2).  This is very handy in the Mario games, where pressing a/1 makes your character run fast enough to get a boost when jumping with the b/2 button.  In those situations, I suppose going back to the Wii controller would probably work but that means adjusting to the Wii's small d-pad and 1/2 (i.e. a/b) buttons.  Still, these minor annoyances pale in comparison to the ability to revisit a vast library of classic games (the Virtual Console is missing some of the great ones, but hopefully one day they will add more) without messing with a pile of dusty cartridges and game systems. I hope my son will one day enjoy playing these old games too, but by the time he's old enough to do that we'll probably have Holodecks and he'll be too busy with Parrises Squares to pay attention to dad's crusty old collection of pixellated games from the stone age. And if that day ever comes, you know where to find me: sipping Mountain Dew while going head-to-head with Ridley.

Monday, July 23, 2012

Pumping Air

This post is, somewhat serendipitously, a follow-up to my previous garage-related post.  While that one was all about speakers, this one is all about a bunch of hot air. Or cool air.  Or whatever the air temperature happens to be at the moment.  Anyway, the point is I finally got an air compressor.  Whee!

Two horses and four gallons of air-compression goodness
I have wanted one of these for years, and way back in 2004 I even went out and bought a cheesy 1-gallon unit from Menard's. It took several minutes to bring its tiny little reservoir to maximum PSI, but it worked for filling up car tires so I didn't complain. I gave it to my cousin about two years later, and didn't really miss it that much until my wife and I bought the house we currently live in.  The big attached garage sure is nice, but there have been a host of times since we moved in that I said a variation of the phrase "If only I had an air compressor..."  And not just for filling up tires, either (though that certainly does come in handy).  Here's a couple examples of why an air compressor is a great tool to have around:

• Cleaning dirt and dust off the lawnmower and other small engine tools
• Cleaning dirt and dust off engine parts under the car hood
• Cleaning dirt and dust off kids' toys
• Cleaning gunk and residue off old household items
• Bringing new life to an old shop-vac air filter
• Drying off wet objects
• Quickly removing sawdust, dirt, and dead bugs from the garage
• Working with pneumatic tools like impact wrenches

Until now I haven't had one though, which means any time a tire is low or something needs to be cleaned with a burst of air, I've had to take it down to the gas station or (gasp!) use one of those little cans of compressed air you can buy at Staples. I remember a time last February when my friend Jon and I actually had to walk our bikes a mile down the road to the gas station to fill up the tires, just so we could start our bike ride.  Not cool :(  The problem is, these things aren't cheap.  A decent compressor runs at least $150-$200 new, and prices kind of skyrocket from there.  Some are meant for different applications, some are bigger, some fill up quicker...yeah, you never thought compressed air was such a hassle, eh?  Fortunately, my dad came to my rescue several months ago with this little gem:
A medieval torture device? No, not quite...
It's a portable air tank he made from an old propane canister, and is great for all the aforementioned tasks...except when it runs out of air.  Fortunately there are several places in town, from tire shops to gas stations, which will fill it up for free.  It's a nice stopgap measure but there's just something nice about having your own for-real air compressor :) But since the price tag was holding me back, I went to the internets for some help.

I belong to a group on Facebook where people here in town post things they want to buy or sell--sort of like a less creepy version of Craigslist.  It's a perpetual online garage sale of sorts, which is continually updated with all manner of clothes, tools, old electronics, nicknacks, and other tchotchkes that people in town and the surrounding communities want to trade. I posted that I was looking for a small air compressor, and less than two hours later someone responded that they had one to sell.  The next day he and I met up on the university campus where we tested it out, and $55 later I drove home with this little blue fella.


It's clearly not new, but not that bad overall.  The oil dipstick is broken off (it's the small circular protrusion sticking up from the solid grey motor), the oil needs to be changed, one of the pressure gauges doesn't work, and the tanks had a fair amount of brown condensate that had to be drained out, but other than that it's in great shape.  I also picked up a good rubber air hose (tip: don't mess with the polyurethane or PVC air hoses. They're more of a hassle than they're worth) and sure enough, it works like a charm.

Like a shop-vac or most power tools, an air compressor isn't one of those things you find yourself using every day unless your job depends on it.  But the times when it's handy to have, it's really handy.