Thursday, June 07, 2012

What's Old is New

I still remember the first digital camera I ever saw.  It was an Apple Quicktake 100 that my uncle brought over to my parents' house way, way back in the day.  It was big, bulky, and had a giant oblong button that had to be squeezed (almost as if your hand was clamping down on a sandwich) in order to activate the shutter.  But it sure was cool being able to take photos without film, though I didn't understand how groundbreaking this concept would be at the time.  Soon afterwards digital cameras like the Sony Digital Mavica started showing up in the hands of my high school teachers, and I remember Mr. Mann documenting our quiz bowl team's trip to Disney World on 3.5" floppy discs using his Mavica clear back in 1998.  But at this point I still used a 35mm film camera, and did not understand how digital photography was about to change the entire landscape of how our culture perceived and shared images.

40 Megs of storage, baby!
And then came storm chasing.  In the summer of 2000, some of my good friends and I spent a few weeks driving my old minivan up and down the midwest in a vain effort to see some tornadoes firsthand.  It was a great time, but unfortunately no tornadic activity was to be seen.  We did, however, have fun documenting the trip on my brother Phil's one-megapxel Kodak DC200 digital marvel (Phil was always way ahead of his time. He once bought an iomega HipZip music player when the iPod was a sparkle in Steve Jobs' eye).  If I remember right, that sucker took photos at a whopping 640x480 resolution and even stamped the date of the photo right on the image just like its 35mm counterparts.  Before we went on the trip, Phil went out and bought a 64 megabyte compact flash card for it too, and I actually scoffed at him for wasting his money. 64 megabytes is too much! There's simply no need for a card that big.

 Fast forward to the fall of 2004, and my girlfriend (who would later become my wife) and I wanted to get a digital camera of our own.  We took a great deal of trips to see our respective families, who were often out of town, and wanted a way to chronicle our visits in some way that could be easily shared.  And even though digital cameras were gaining in popularity by then (cameras on phones were not quite a novelty yet, but not entirely uncommon either) I still thought they were somewhat magical.  The one we picked out was a Canon Powershot SD100 Digital ELPH, which rendered images in a gigantic 3.2 megapixel canvas.  It even took videos, which I could edit in iMovie to create masterworks like this cheesy music video about my cousin's cat.

All this time I knew nothing of focal lengths, apertures, f-stops, ISO, or any of the other elements that are so critical to photography.  All I knew was that if I wanted to take more pictures on a memory card I could bump the JPEG compression down a notch to "Medium" from "Fine".  And that was good enough, really, because essentially cameras like this were doing what they were designed to do: democratize the photographic process by allowing virtually anyone to take snapshots and share them electronically.  And that little camera served us well for several years until the screen started to get all fuzzy due to some kind of microchip malfunction, and sometime in the fall of 2006 all the pictures it took were nothing but black and grey scratches.

So once again we upgraded, this time to a Canon Powershot SD1000 Digital ELPH, which if I understand Canon's naming conventions, was roughly nine-hundred better than our original camera.  But aside from jamming more pixels onto the CCD image sensor, this one was merely a smaller, lighter, more usable version of the other camera.  It was a great little device to have, that's for sure, and we took thousands of photos on it over the next several years.  We liked its small size and ability to take good photos, especially outdoors, and most of the photos that now line the walls of our house were taken with that little guy.

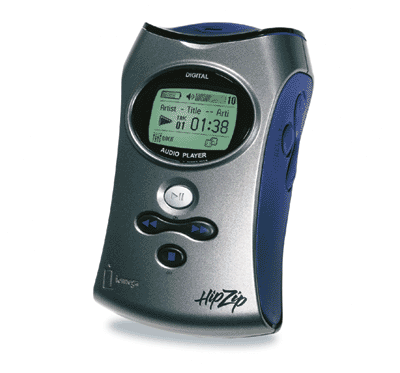
But then, as the wheels of time rolled ever onward, it became necessary for yet another upgrade.  Though to be fair, the desire for a new camera was not brought on by sheer techno-lust for the Next Coolest Thing, but by the need to have two cameras in order to photograph documents for a research project.  One would simply not suffice.  So after much research, and a recommendation from one of my favorite tech journalists Andy Ihnatko, we dropped about $250 for a Panasonic ZS7--surely the last digital camera we would ever purchase!  With a wide-angle lens, 720p movie recording capability, plenty of manual controls, and a built-in GPS, there simply would not be any reason for another camera...right?  And in the year and a half since we bought it, the little guy has served us remarkably well.  It's a rugged, durable piece of digital wizardry that takes amazing outdoor photos and crisp HD video.  And on a trip to DC, the ZS7's crazy zoom lens made the Washington Monument feel like it was right next to us while we stood by the Capitol building at the other end of the Mall.

Panasonic Lumix ZS7: Buttons, buttons, everywhere...
I even tried to make sense of all the manual controls, too.  Aperture-priority and shutter-priority modes, exposure adjustments, white balance settings, and a host of other buttons and knobs to fiddle with have resulted in many late nights poring over instruction manuals, online guides, and YouTube videos trying desperately to wrest the camera into photographic submission. I had always heard that it was the photographer, not the camera, that made for good photos.  But despite my efforts nothing seemed to work, and I always ended up going back to the ol' Auto setting most of the time.  And ever since our son was born last summer I could not figure out why so many of our pictures of him looked so bad, no matter how I fiddled with the camera.  It's not that they were terrible, but the color was always kind of flat, the photos were kind of distorted, and if we were indoors (which often happens with an infant) we had almost no choice but to use the flash unless we wanted pictures that were blurry or grainy.  It was downright frustrating, and several times we talked about going to a professional portrait studio to get some pictures taken because ours just weren't turning out that well.

And so about one month back we started thinking about purchasing a digital SLR camera.  Neither of us have really used digital SLR cameras, but when my dad or my brother Andy used their SLRs to take pictures of us or our son we were always impressed with how they looked.  The light was so natural.  The pictures were so realistic.  There was often no grain or pixellation in their photos, and at the risk of sounding like a photo snob, I really liked how much better these pictures turned out compared to our trusty little ZS7 or SD1000 (which, incidentally, was lost on a trip to Minnesota last October.  *snif*).  We weren't sure we were ready to take the leap though, so I asked a coworker who also happens to be a professional photographer if he could come by and show us his Nikon D200 for the afternoon.

And wow, did that ever open up the floodgates.

With just a couple snapshots of our son in the living room, we were hooked.  That camera was able to bring out so much detail in his face, and so much clarity in his steel-blue eyes, while showing nearly every wisp of hair on his 10-month-old head that I could hardly believe my coworker was not charging us hundreds of dollars for what surely must be a full-fledged portrait session. But no, these were just regular pictures that the three of us were taking with a much nicer camera than I had ever used before.  It was stunning.

Turns out the secret sauce for getting such good photographs wasn't so much the camera as it was the lens: a Nikon 50mm f/1.8G (numbers and letters that, a few weeks ago, were entirely meaningless to me), to be specific.  This 50mm lens my coworker brought over, as I have recently learned, is one of the tried-and-true tools of the photographic trade, and perfectly suited for the kinds of photos my wife and I have been wanting to take of our son.  We knew right away that we wanted to buy one of these fancy-pants digital SLR cameras and turn our photo-taking up to 11.

But which one to get?  That's the real trick, isn't it.  And one which we really wanted to get right.  After much research we settled on a Nikon D5100, which seemed to get everything right: a great image sensor, lots of manual controls like our ZS7, a big ol' LCD screen on the back that swiveled out, 1080p movie-recording capabilities...you name it, this camera has is.  It is generally well-reviewed at various online outlets too, which is always a good thing.  And then we went to Best Buy where I got to pick one up and hold it.  Ouch.  It felt like it was made of cheap plastic, and I got the feeling that the swivel-out LCD screen would break right off if I looked it funny.  I was not impressed, no matter how many megapixels it had or how good its built-in flash was.

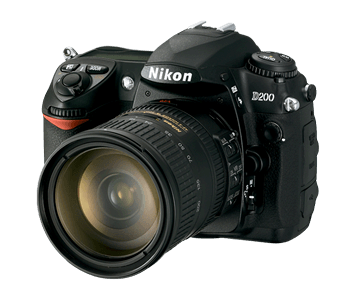
Nikon D200: An oldie but a goodie.
So what to do?  After much deliberation, and frequent consulting with my professional photographer coworkers (both of whom are big Nikon fans), we settled on a used Nikon D200.  But why a used six-year-old camera that doesn't take movies instead of a brand-new D5100?  Good question.  To answer it we thought about what was really important for us: taking good photos of our son. Our ZS7 works fine for videos, so we did not really need another video-capable camera.  The D5100 has a higher megapixel count, but we rarely take any pictures above 5 megapixels.  The more we investigated, the more the D5100 seemed like a step up from point-and-shoot cameras, whereas the D200 appeared to offer more direct control over the photography process--something that, combined with the solid build quality that made the camera feel like it could easily withstand the rough handling of a family with an infant son, made the D200 the ideal choice.  That's not to say that the D5100 is a bad camera, though--far from it.  We have come across people who own similar models and greatly enjoy them. I'm sure it is a fine camera, but it didn't really fit the bill for what was important to us.

And so we bought one from Adorama Camera, which also sold us a two-year warranty for about $50.  Normally I don't go for these warranties, but on used equipment it seemed like a good idea.  And instead of the standard "kit" lens, we bought the 50mm 1.8G that my coworker showed us.  In the roughly four weeks since we have purchased the camera, it seems as a whole new world of photo-taking has opened up that was, previously, hidden right before our eyes.  I know this probably sounds a tad cliche, and possibly a bit snobbish, but I really had no idea what a camera could do until we started playing around with this D200 and accompanying 50mm lens.

I would like to post some examples to show what I mean when I say it takes so much better photos, and I probably will in the coming days and weeks, but if I had to sum up everything that makes this camera better than any of our previous point-and-shoot models in a couple bullet points it would be:

- Incredibly detailed photos, with very little grain or noise.
- We hardly ever need to use the flash, which makes photos look much more natural and pleasing.
- Bokeh. This is the effect that happens when the thing you want to stand out in the picture is sharp, but the background and foreground is kind of blurry.  Here's a photo I took last weekend that illustrates this concept:
(click for full-size version)
Bokeh might seem like a silly artsy-fartsy reason to have a camera, but we have discovered how much it enhances even simple photos of people (specifically our son).  Just google bokeh portrait images and you'll see what I mean.

Beyond that there's a whole bunch of other reasons we like this camera, but this blog post is getting pretty long and I think I need to wrap things up.  Suffice to say, the D200 has been an amazing improvement for us and we are excited to explore more about photography as we continue to learn more about the camera and how to use it.

Friday, June 01, 2012

Hungry for baby food and it's feeding time

I think it's high time to finally write a post on something I have been wanting to write about for a while: baby food.  Now, don't worry here--I'm not about to go off on an anti-corporate tirade, or tell you how you are feeding your child all wrong, or start looking for directions to Burning Man or anything like that. But like my cloth diapers post, I just want to take a few minutes to describe something my wife and I are doing for our kid.  Nothing more, nothing less.  All parents are different, and all kids are different, so don't take this as some kind of you-must-do-this-or-you-have-failed-as-a-parent blog post.  Basically, it's all good, so just hang in there as I explain what we have been doing for baby food the past several months.  :)

We started introducing solid foods to our son when he was about six months old, beginning with good ol' rice cereal.  He didn't like it that much, and if I remember right it didn't really sit well with his tummy, so we started looking for other alternatives.  We soon settled on buckwheat, thanks to a tip from my mom:
This is Buckwheat. What is Buckwheat? Who knows.
My mother has celiac sprue, a condition that renders her body unable to process wheat gluten. Unfortunately wheat gluten is found in just about everything, and we're trying to keep it away from our son until he's about a year old just in case it will help him avoid developing this condition as well.  Buckwheat, whatever it is, doesn't have wheat gluten, so that's good.  Buckwheat is pretty easy to make, and we have been mixing it with his other foods for several months now and it has worked out very well.  So there's that.

But what of his other foods?  Well, that's where things get interesting.  We wanted to try making baby food ourselves, since it didn't seem like it would be all that difficult and would probably be healthier than anything we could find at a store.  And rather than describe this, I'll just use an example from last night when we made up a batch of apples and apricots.

I like to eat, eat, eat, apples and...um...apricots.
That's a pot on our stove full of sliced apples and apricots.  I forget how many, but I think it was about 13 apricots and maybe 10 apples.  We get them from Nature's Supply, a local place that sells organic stuff.  But stay with me for a second here!  Why mess with all that hippie-dippie organic junk?  Simple: we just like it better. The fruit tastes better, the veggies are fresher, and we like that it's not treated with pesticides and stuff like that.  Like I said though, I'm not here to tell anyone else how to feed his or her child, so if organic food isn't your thing, no big deal.  We happen to like it.  And as for the cost? I'll get to that in a minute :)

So anyway, we chopped everything up, added about two cups of water, and cooked it for about 30 minutes.  All this is mostly guesswork and not an exact science, so for each batch of food we kind of just cook or bake or steam everything until we think it's soft enough to blend in a food processor.  The one we have is small, but it gets the job done very well.  It was a nice gift from my wife's parents, and we have certainly gotten plenty of use out of it.

It might not look like much, but it's got it where it counts.
Like I said, it's small, so it takes a few rounds of blending to get all the food processed into a nice gooey food-like substance:

A comb? A brush? Nope, just a bowl full of mush.
As you can see, this is not really a complicated process.  This blender only has two options: chop and grind, so it's hard to screw things up.  One spins the blade clockwise, and the other reverses it.  Grind pretty much does the trick these days, though when our son was younger we would grind and chop and grind and chop until everything was nice and runny.  Now that he's almost 11 months we leave a lot of bigger pieces because he's much better about chewing things up on his own.

But what to do about all this food once we get it in mush form?  It would spoil after a couple days in the fridge, and it is obviously too much to eat at once.  So we use my mom's solution: freeze it.  But not in one big chunk because that would be kind of difficult to, you know, actually use for a meal.  Instead we put everything in ice cube trays.
Ice cube trays, or tiny food storage lockers?
Last night we made so much food that there was even a bit leftover in the bowl, so we just put that in the fridge for meals today.  Pretty easy stuff, I tell ya.  And at mealtime we just thaw a couple cubes of food in the microwave, which takes about two minutes in total. Our freezer is full of tupperware dishes containing a variety of fruits and veggies that we have cooked up like this.  For veggies we steam them instead of boil them, but the process and the result is the same.  Come to think of it, here's all the homemade food we have made for our son using this method:

Carrots (cut up first, then steam, then blend)
Zucchini (cut up first, then steam, then blend)
Pears (slice 'em and put 'em right in the blender)
Avocados (scoop out the insides, then drop into the blender)
Butternut Squash (cut in half, scoop out seeds, bake in 1 inch of water for 40 minutes, then blend)
Sweet Potatoes (poke with fork, wrap in foil, bake for 1 hour at 400 degrees, then blend)
Green Beans (steam, then blend)
Peas, though he mostly just eats these on his own without blending
Apples (duh)
Apricots (duh again)


So what about the cost of all this?  Well, here's our bill for this particular batch of food:
Not included: hemp socks and acid-free dreadlock cleaning powder.
$25.58 might seem like a lot at first but let's break it down here.  Our son eats about two cubes of food per meal (two and a half for lunch), and has three meals of solid foods a day.  We haven't switched to solid foods entirely yet, so this amount will obviously increase in the coming months, but it's a good place to start for calculating the cost of everything.  If we leave out the extra food in the bowl, we have 48 cubes of food which translates into roughly 24 meals, give or take.  But remember the buckwheat from earlier?  Well, each meal for our son is one cube of buckwheat and one cube of fruits or veggies.  And one package of buckwheat makes roughly 60 cubes when prepared according to the stovetop directions.  So what we have here is a grand total of about 84 cubes of food for $25.58.  And if we figure 2.5 cubes of food per meal (which is overestimating) this translates into roughly 33 meals, which means the cost per meal is around 77 cents.  Or to put it another way, we can feed our son for a month on about $25.

So how does that compare to store-bought baby food?  To be honest I'm not really sure but I think it's roughly the same cost or thereabouts.  We don't buy a lot of store-bought baby food, and the point here is not to compare one method of baby food preparation to another.  I just wanted to share our particular method of making sure our kid is well nourished.  If you have any comments or questions, please share them below.  Or if you can shed any insight into how this compares to store-bought baby food, that would be cool too :)

Wednesday, May 30, 2012

Getting a handle on things

Just a heads-up that this won't be the most interesting post ever, or even that noteworthy. But since I'm using my blog to showcase the things we are doing around our house recently, I figure it might be worth a mention.

Recently one of our inside door handles started to malfunction.  Specifically, it would not open after the door was closed.  This handle is attached to a fairly nonessential door that separates an entryway in our house from the laundry room, so if the door didn't work correctly it was not going to be the most challenging of home ownership issues.  Still, we did want to do something about it, so I took the handle apart, squirted some Liquid Wrench Silicone Spray (one of my favorite substances to have around) into various crevices, put the thing back together, and it worked just fine.  Problem solved!

Except not really.  A week later the handle was even worse, and wouldn't turn at all.  So I took it apart once again and discovered that the pin mechanism (the thing that retracts into the door when you turn the handle) was broken.  I have no idea how this happened, but the plastic build told me that poor craftsmanship could have been the culprit.  In any case it was not repairable, so we went to Lowe's and picked up another handle which I installed last night.  It's kind of a burnished bronze finish, which sure beats the faux gold finish on the previous handle, and we are now considering buying more of these handles to replace other doors just because they look so good.

Our door, sans handle.

The old broken handle, and our new replacement handle. Yay!

Our door, with handle. (Like I said, this was not going to be an especially exciting post, folks)

The old-style handle on the left, and our fancy-pants new handle on the right. Whee!

Tuesday, May 22, 2012

Painting Pics

And as promised, here's a couple pictures from the dining room repainting.  It looks like an awful mess right now, but that tends to happen with painting projects.  I promise you things will look much better when we're all done!

We have painted without taping the edges, but have found that the time spent in taking this extra step is generally worth it in the long run.

After much trial and error, we settled on this color thanks to our friend Sarah who is a genius when it comes to interior decorating. The room just beyond the opening is a deep red, and the dining room had to have a bold color that could hold its own against the red.

This primer was tinted to match the actual color, but without the eggshell finish it looks rather dull and bland. But since it's just primer it's not really supposed to be shiny and fancy.

The finished walls, after two coats of paint.  The top and bottom need a coat of white paint yet, since the existing paint is kind of dull and faded, but the hardest part of the job is done.

Monday, May 21, 2012

Eclipsing

Did you see the Eclipse last night?  My brother called me about 8:30 to remind me to go outside and catch a glimpse of it, but since I had neither proper viewing glasses or a welding helmet, I decided not to risk damaging my retinas and stay indoors to continue working on the painting project my wife and I were already engaged in when he called.  It sure would have been cool to go watch though, and hopefully we can get some solar viewing in during the Transit of Venus in a couple weeks. But even though we missed the eclipse, we did manage to eclipse a layer of primer with paint...so perhaps that counts for something.

We are almost done painting our dining room, and so far it looks fantastic.  Using spackle to fill in some nail holes in the wall worked very well, but for the little nicks and dings I mentioned before we just painted right over them.  They were too shallow for spackle, and with the new coat of paint they are barely noticeable even if you know where to look for them.  After that we applied an entire coat of primer, though I'm not exactly sure why.  The clerk at Lowe's kind of talked us into using primer, even though we have painted before without it.  I think it works best if you are painting a wall with no previous paint, like new wood or drywall, because the purpose of primer is to give the actual paint a good surface to which it can adhere.  After we had primed the wall we both agreed that it probably wasn't necessary, but I guess we can rest easy knowing we went the extra mile anyway even if it didn't actually help us out that much. It certainly didn't hurt things, so we've got that going for us :)

After the primer dried on we went over the whole thing with two coats of Olympic Premium One, because on textured walls like ours it's almost impossible to get everything covered in one coat (and yes we have tried, many times).  The trick with this room, as our friend Sarah explained, was getting a color that looked good but could also hold its own next to the very deep red of the living room walls.  And after looking at the results last night and this morning...so far so good.  The next step is to paint the trim above, which we started last night and hope to finish tonight.  After that we need to decide if we want to go ahead and do the bottom portion of the walls, since the white paint is somewhat faded and we already have the room prepared for painting anyway.  We'll see what happens on that front though, but in the meantime it's nice to at least have the major portion completed.  I'll see if I can post some photos in the next few days to show the before-and-after comparison.

Tuesday, May 15, 2012

Tearing down the wall(paper)

In an effort to hurry up and get this wallpaper project done, we have set a somewhat arbitrary deadline for ourselves of June 2.  That would mean it would be finished roughly six months from when we started, but there's about a five-months span in there that doesn't really count because of school, work, and taking care of our kid :)  But we're not big fans of starting household projects and then letting them sit in a perpetual state of flux, so we decided to buckle down and just get this job finished.  The wallpaper was taken down several months ago, followed by the removal of the wallpaper backing, which left bits and pieces of backing that were still stuck to the wall.  And that's where we started a few days ago--removing those bits with hot water, dish rags, and a big canvas dropcloth to catch everything.  Except for a few spots, it all came off pretty easily and now we are left with four nice off-white walls just waiting to be painted.

The final piece of the puzzle, though, is what to do with the few nicks and dings that the walls suffered throughout this whole process.  Nothing serious, mind you, but enough that we just want to make sure we proceed carefully. (This is, after all, our "formal" dining room. And we'd rather make sure we do things right the first time than try and fix it a year down the road.)  After checking with some friends who have much more experience in doing this sort of thing than we do, we decided to not sweat the details of covering these little nicks and dings up too much and just use some Kilz primer, along with some light spackling (we actually bought some spackle from Lowe's that is specifically designed for this kind of thing) and have a go at it.  Well, that's the plan anyway.

We have everything we need to start work on this final step, but we probably won't get to it for a few days. In the picture above you can see the white formerly-papered walls, the new color we will be painting them, and a couple tiny dings in the middle of the corner.  Hopefully when we're all done all that will be noticeable is the paint :)

Friday, May 11, 2012

Resetting and restarting

So here's the deal.  I used to update this blog several times a week, with general observations about positive or encouraging things I saw happening in my life.  But then, as so often happens with blogs like this, other things started crowding it out.  Work, graduate school, family...something's gotta give, right?  And sadly, it was this blog.  Much as I didn't like to see it happen, I realized that I just wasn't up to writing on it like I once was.  I have kept up a very active twitter account, but 140 characters is a far cry from actual blog posts.  And often, when I have thought about something that would make for an interesting blog post, I have been sidetracked by other events or, loathe as I am to admit it, just too lazy to write about it.

So I have been thinking about what I can do to keep the ol' blog going.  The major focus of my life right now is my family, and raising our son is far more important than writing on a blog.  But I don't want this blog to be just a journal about my kid--in fact, I want to keep things quite the opposite.  I would rather not have information about, and photos of, my kid put up publicly for the world to see.  We use other online tools to share these things with specific people, but since I don't know who exactly reads this blog I would rather not have my son's life chronicled for, potentially, all the world to read and see.

What I am going to try, though, is write posts about the things we (meaning me and my family) are doing to improve things around the house, yard, etc.  It might not be the most interesting stuff, but it's something I think I can latch on to and post about on a regular basis.  Like last night's project of working on removing wallpaper from one of our rooms:  it's something we have been working on for a while, and we hope to finish in the next few weeks.  I think it might make for an interesting post--the methods we are using, the tools we are trying, and the time it is taking.  There's also the swing we put up, the grass we're trying to grow, the new recipes we are trying...things like that would, I think, be a nice way for me to approach the blog that would make for somewhat interesting (and hopefully, somewhat regular) updates.  Maybe even a picture or two.  Who knows, eh?

And credit where credit is due...I kind of got the idea to do this from my friend Julie who, despite the many changes and upheavals in her life, has been using her blog as a way of sharing the things she is working on to keep busy as well as share her thoughts about things.  And so here's hoping for a bright future for The Brighter Side!